Oil Painting Flowers – The Twilight Rose part 2
Adding Color to Your Oil Painting
This is the second part of my original post on oil painting flowers, in which the color will be added in another translucent layer of oil paint…
yes, paint right over everything again…but, this time instead of black, white, and in shades of gray it’s in color!
You’ll be painting over the dead layer, which was the last step of the previous post…in case you missed it you can click here to read it first.
I really should’ve taken a picture before blending the colors together in this step, but didn’t think of it at the time…anyways, it’s almost like doing a paint by number painting…remember those?
You basically add or block in all the colors in their various tones…it looks like a blotchy mess up close, but once you blend the colors together it’ll look much better…just don’t go overboard with blending or you’ll end up with a muddy mess too.
If you do, well, that can be fixed…just wipe it off with a clean dry rag and start over. Remember, to keep the paint rather thin…you should be able to “see” through it.
So, before adding it to your painting, test it out on a piece of test canvas or even an old paper grocery bag, which is what I did. Canvas isn’t exactly cheap, so why not use what’s laying around?
Actually, I keep a couple of these handy old paper grocery bags under the tabletop easel I use for smaller canvases. It keeps the table protected, plus, it’s right there so I can test the paint thickness on it…or wipe off excess paint from my brush too.
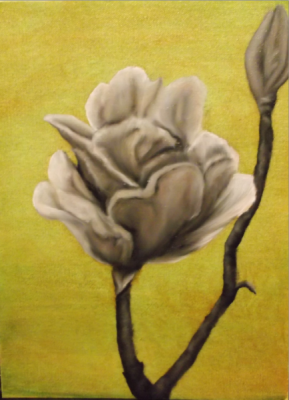
So, here it is…the Twilight Rose with it’s first layer of color…
Afterwards, there needed to be time to let it dry…about a week or so usually.
Yes, you read that right…the first layer of color!
If I remember correctly, I added two more after this as glazes, which is adding a very thin color over the painting in areas in which you want a certain color to stand out more or become deeper.
Some of the colors of oil paints I added were crimson red, rose madder, vermillion, prussian blue, yellow medium and titanium white.
Plus, enough linseed oil to make them more transparent so you can still see a bit of the other layers underneath.
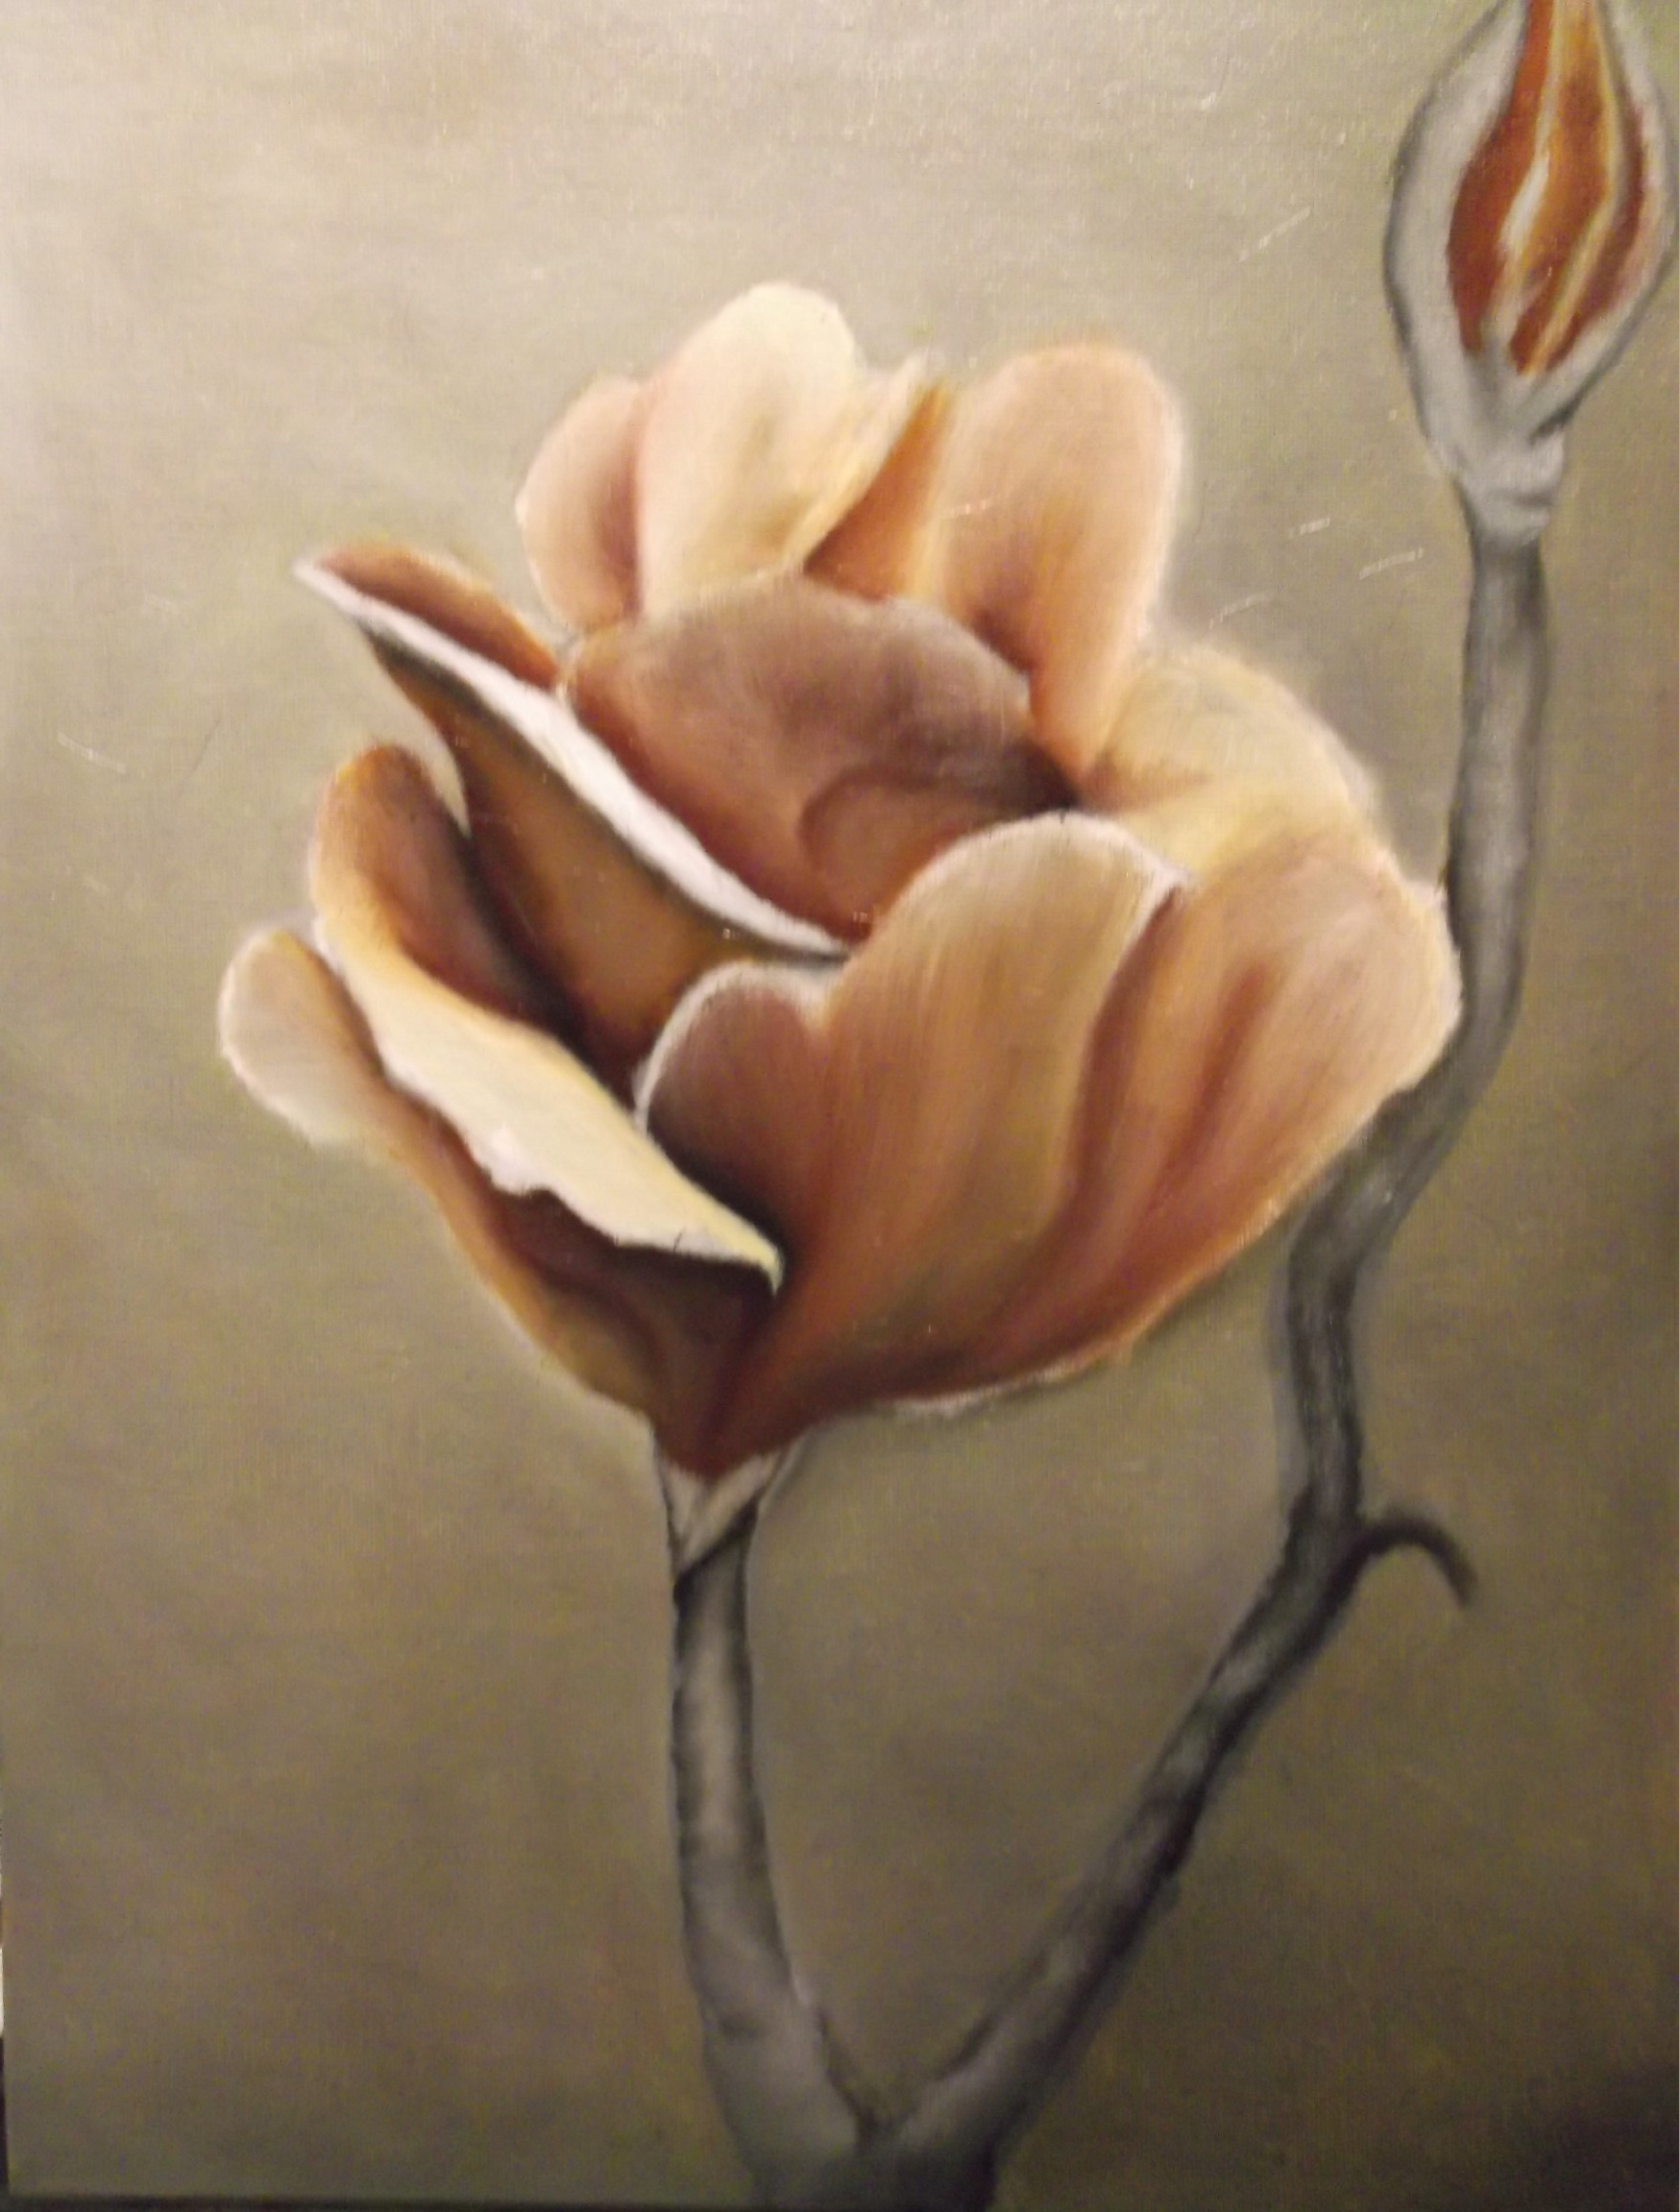
And, here it is below with the first of two glazes on the rose and also the background is painted in…notice the one above is the dead layer background showing yet…
Next, I did the second glaze over the petals of the rose with a very thin layer of Rose Madder….
Here it is…

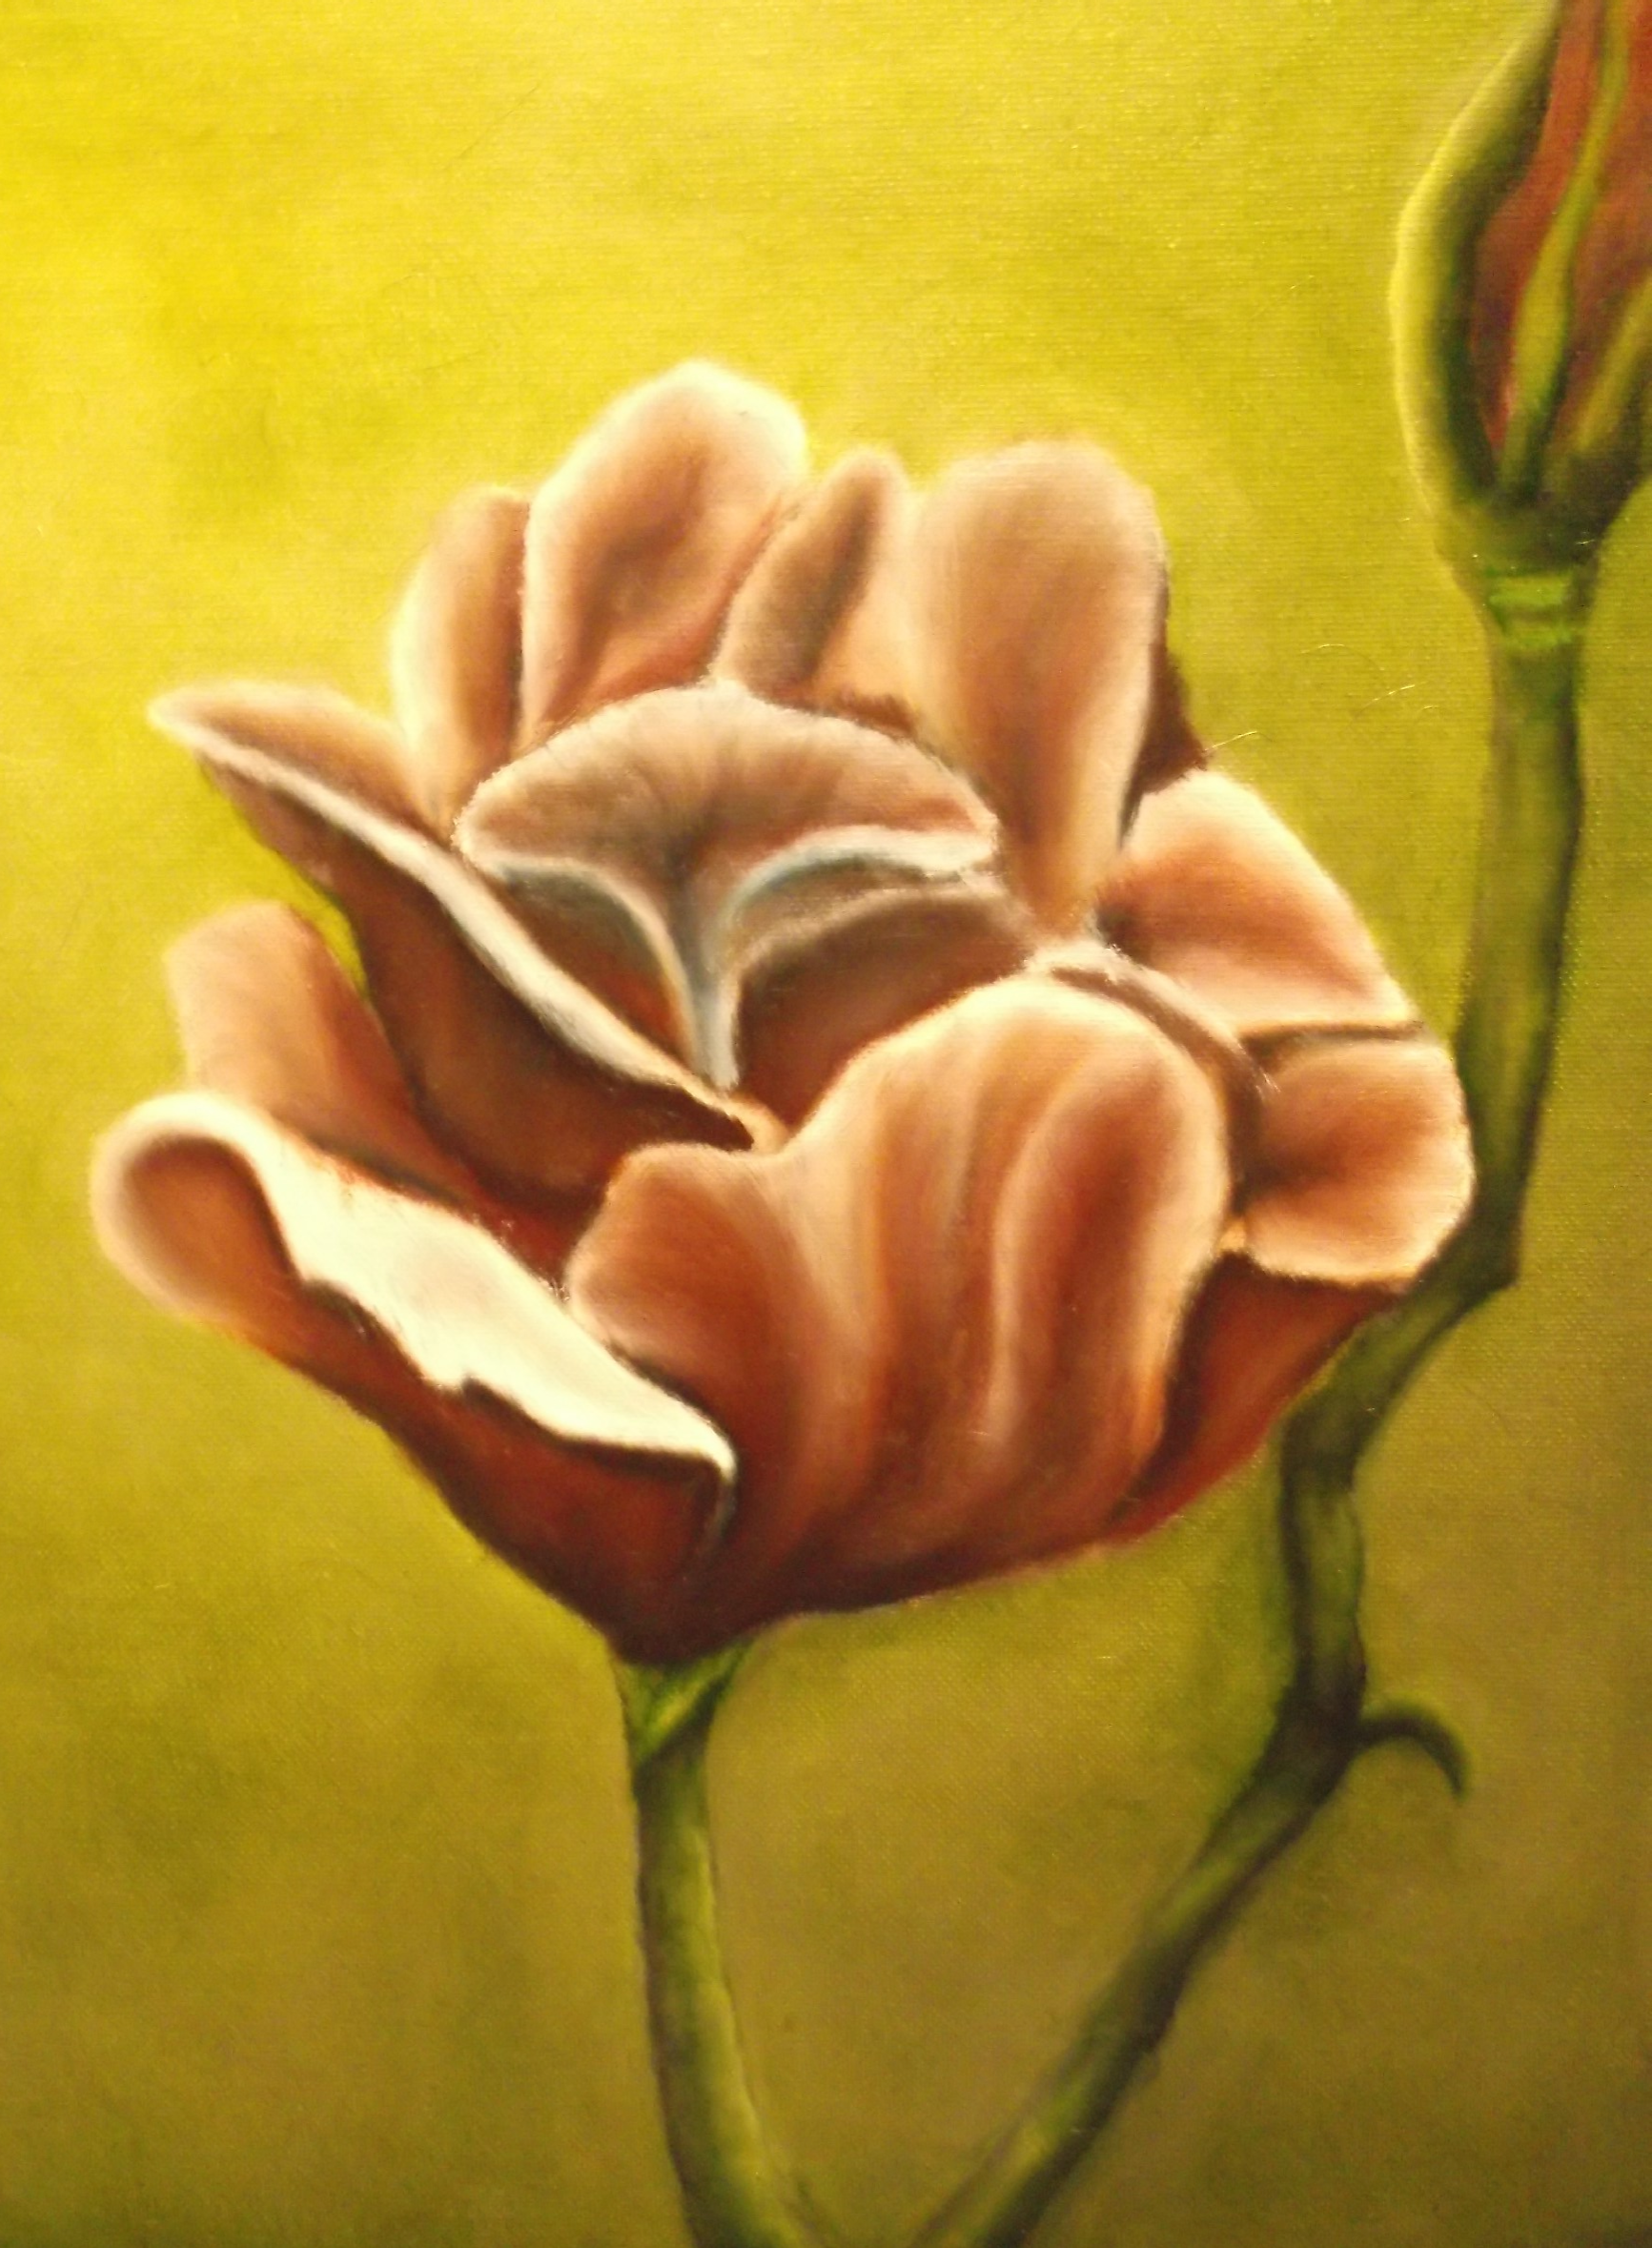
After adding this layer or paint glaze, on both the flower petals and also the background the colors changed quite a bit. Notice the difference between this last image and the ones further up?
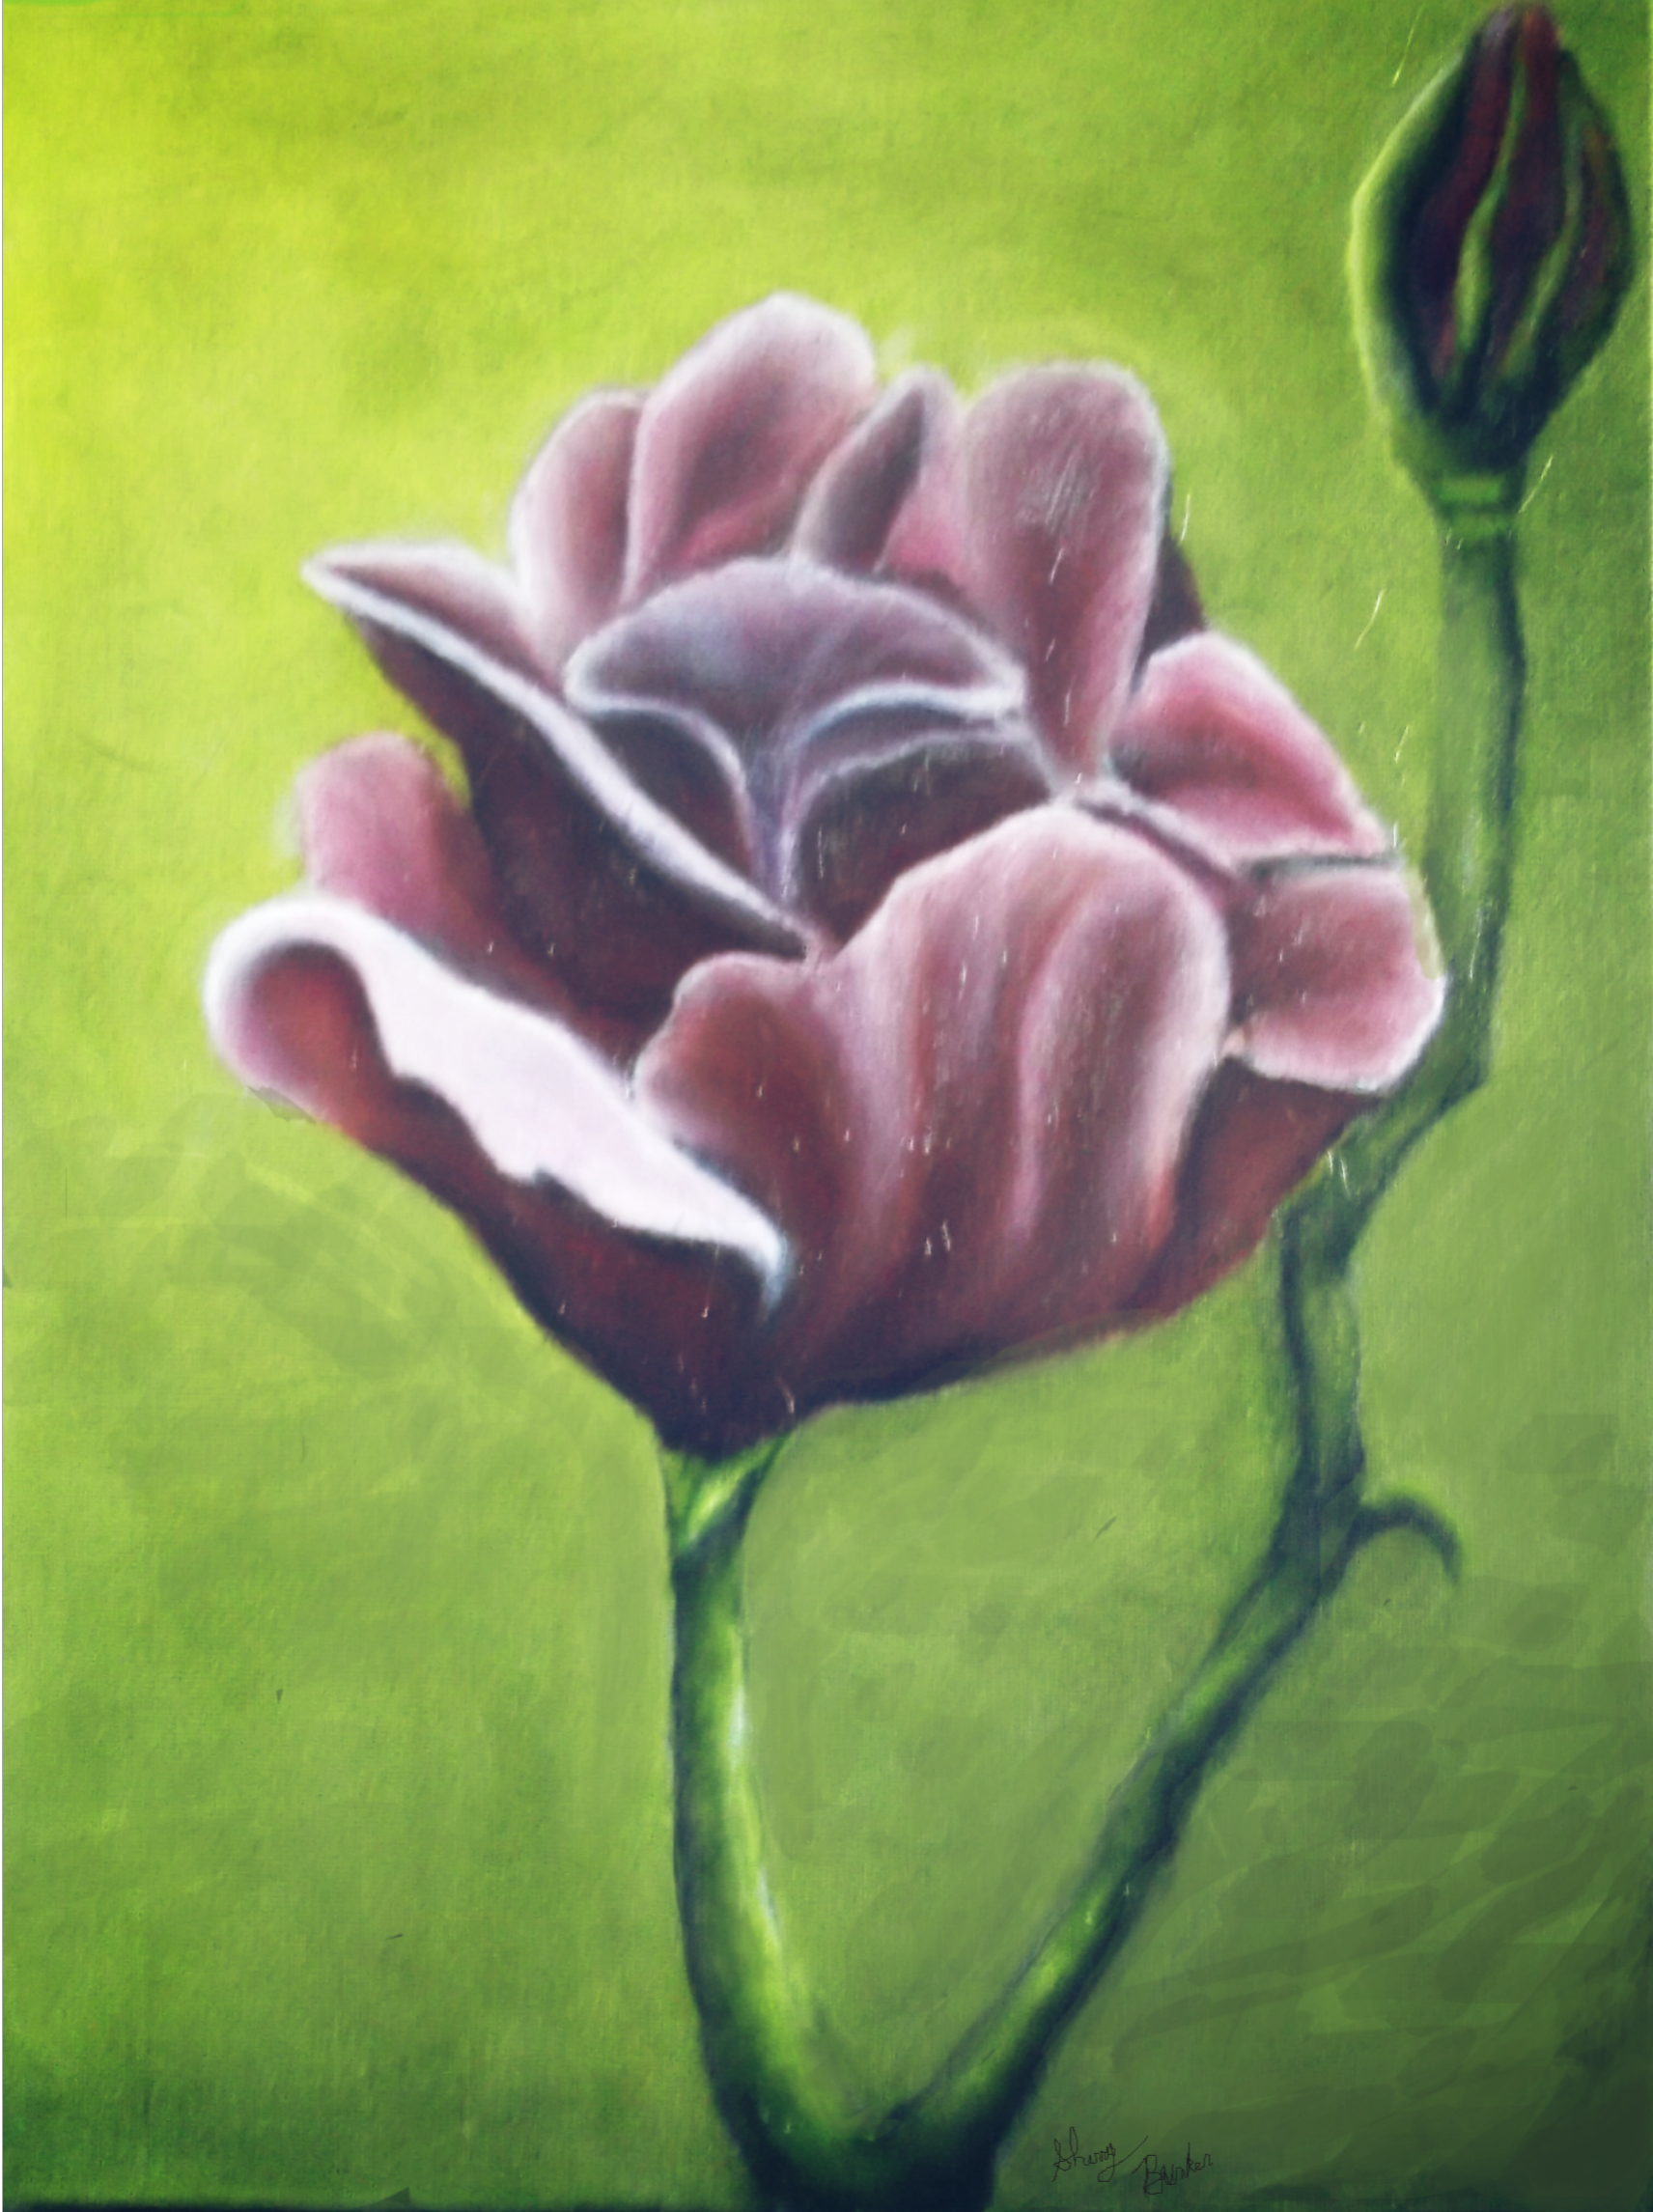
Adding Highlights
The next and almost final step is adding the white highlights using titanium white in the areas that appear to be white or almost white.
And, here it is the final image at last…the rose with added highlight areas!
>>Click here to order prints!<<
It took a total of four months to get to the last image here with the added highlights…but, there is one more step that would probably be a good idea to do in the future…
Add a coat or two of varnish or some type of fixative to the painting. Coating it with layers of varnish will protect the painting from becoming ruined if something spills or splashes on it, and not to mention, protect the oil paint from when you’re cleaning the dust off of it…plus, I believe it helps protect it from sun damage too.
Since oil paint takes so long to completely dry and then some, it’s better to wait about six months or more before spraying or coating it with varnish…even if it feels dry to the touch, it’s actually not…at least usually, but it depends if you use different mediums added to the paint too. There are products out there such as Liquin to shorten the drying time of oil paint…something I need to try someday soon!
Once you do get to the day you decide to coat your oil painting with varnish please do make sure it is in a well-ventilated area! The stuff is toxic to be breathing in!
Hope you enjoyed reading and got something useful out of it! Oh, and if you like this, found it helpful, interesting, etc…
Please feel free to share with your art loving friends!
If you have any suggestions or tips you’d like to add or have any questions about oil painting please let me know in the comment box below! I’d love to hear from you!
Best wishes 🙂 -Sherry